The Description of Nginx virus:
Nginx virus, deemed as a browser hijacker, is able to block popular websites such as Google Chrome, Youtube, Yahoo, Facebook and other similar ones. Nginx virus is able to alter system settings and change your homepage without users' permission.
In order to avoid Nginx hjacker, it is recommended that you should pay much attention to the download as well as the installation of freeware. The reason is that the freeware is usually packed with optional components like plugins and browser add-ons.
Once Nginx virus enters the computer, it will hide in the computer system and affect all major web browsers such as Internet Explorer, Mozilla Firefox, and Google Chrome. Then, the web browsers will act abnormally and the users will just receive a blank page saying “Welcome to Nginx” when they try to enter these popular websites.
With Nginx virus hijacking, numerous pop-up ads, redirects to unknown even corrupted websites will flood into the computer, which will disturb the online activities greatly and cause many other trouble to the computer system. As a result, the computer and network performance slow down greatly. What’s worse, Nginx virus can record your online activities even steal your important information such as credit card numbers, IP address and privacy data, etc for hackers to play vicious actions, which may cause a big loss in privacy as well as money. In this case, it is recommended that you should use an reputable anti-spyware you trust to scan and detect your PC thoroughly.
Nginx virus - How to Remove?
Method one: Step-by-step removal guides
For Internet Explorer:
1. Click Tools in the Menu bar, and then select Internet Options.
2. Click Programs tab, and click Manage add-ons and disable the suspicious add-ons
For Firefox:
1. Click Tools in the Menu bar and then click Add-ons
2. Click Extensions, select the related browser add-ons and click Disable
For Google Chrome:
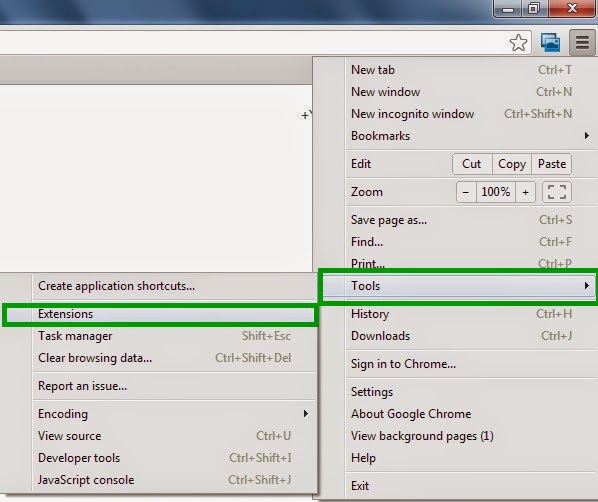
1. Click Customize and control Google Chrome button, and then select Tools, under Tools, select Extensions.
1. Click Tools in the Menu bar and then click Add-ons
2. Click Extensions, select the related browser add-ons and click Disable
For Google Chrome:
1. Click Customize and control Google Chrome button, and then select Tools, under Tools, select Extensions.
2. Disable the extensions of Nginx virus.
Step2. End All Processes Related to Nginx virus.
1. Press Ctrl+Shift+Esc together to open Windows Task Manager, and then click Processes tab.
2. Find out and end the processes of Nginx virus.
Step3. Show Hidden Files
1. Click on Start button and then on Control Panel, and then click on Appearance and Personalization.
Step3. Show Hidden Files
1. Click on Start button and then on Control Panel, and then click on Appearance and Personalization.
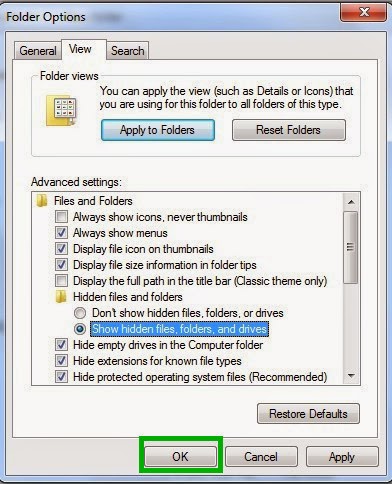
2. Click on Folder Options, and then click on the View tab in the Folder Options window and choose Show hidden files, folders, and drives under the Hidden files and folders category.
3. Click OK at the bottom of the Folder Options window
Step4. Delete Relevant Registry Entries and Files
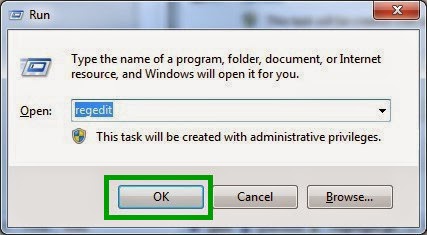
1. Delete the registry entries related to Nginx virus through Registry Editor
Press Win+R to open the Run window, type “regedit” and click “OK”. Then, search and delete its registry entries.
2. Find out and remove the associated files.
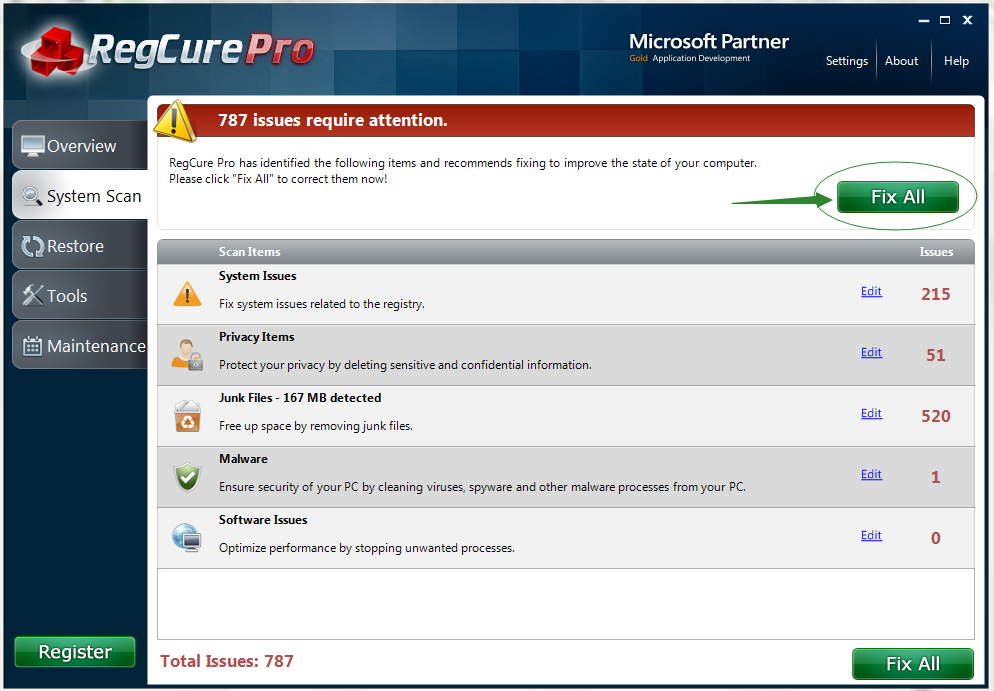
Step5. Using RegCure Pro to Optimize Your System After Manual Removal
As Nginx virus is relatively stubborn and tricky, it is hard for certain inexperienced computer users to manually remove it completely from the system. To avoid some potential computer threats, you are suggested to download RegCure Pro to optimize your computer for good.
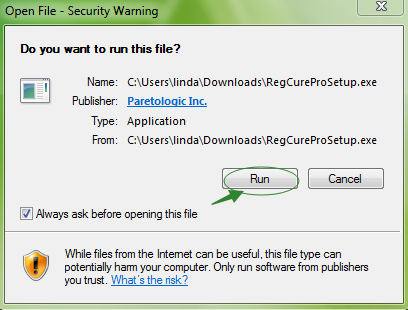
Step1: Click the icon below to download the RegCure Pro.

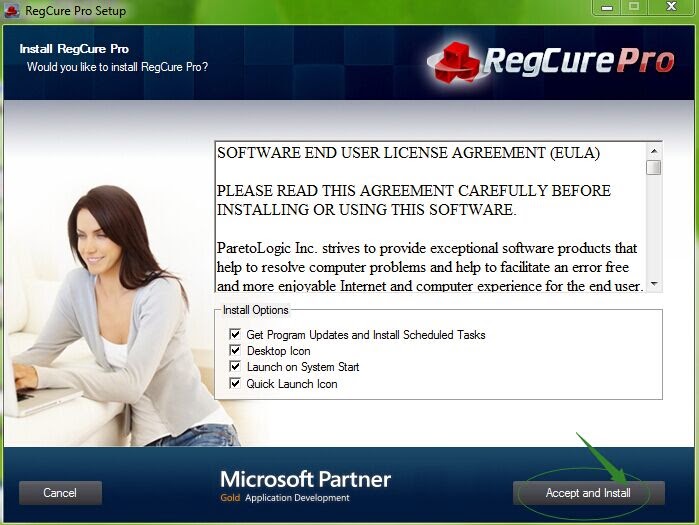
Step3: Click the button Accept and Install. And RegCure Pro will be installed successfully on your desktop.
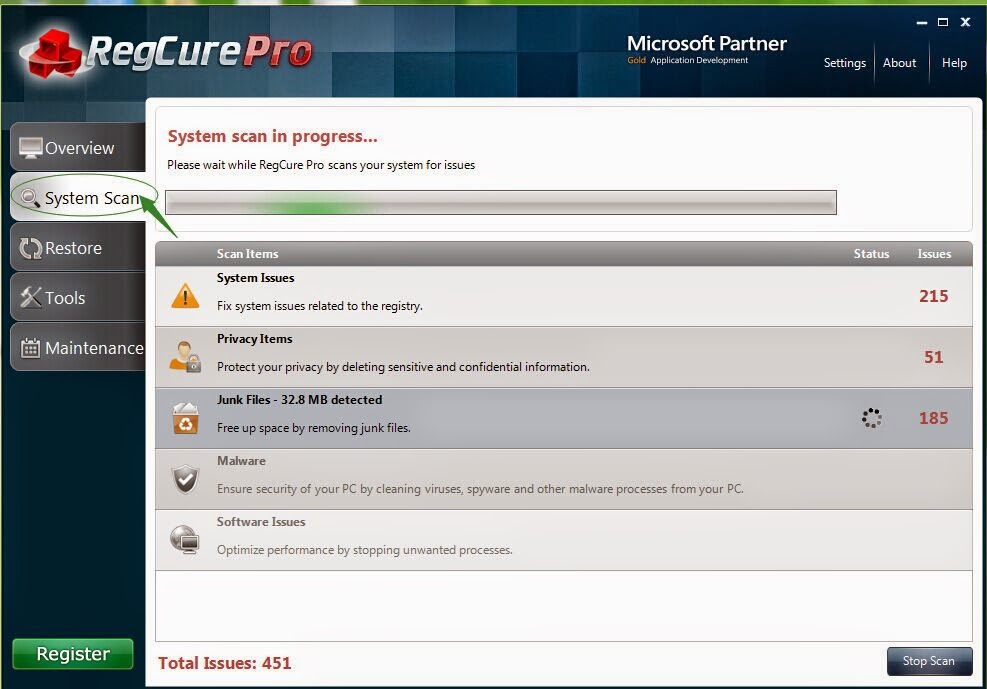
Step5: Click the button Fix All to optimize your PC.
Method two: Automatically remove Nginx virus with SpyHunter
SpyHunter is a reputable and professional removal tool which is designed specifically to automatically detect and delete various kinds of threats completely within minutes.
You can follow the simple steps given below to install it on your PC and then use it to remove all the threats in your PC and also protect your system in the following days.
Step1: Click the yellow icon “Download”.

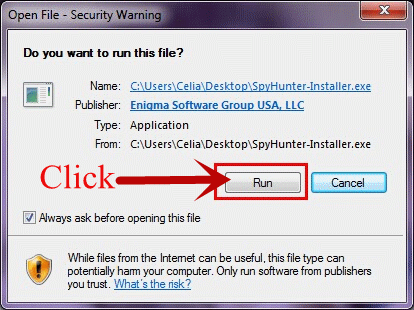
Step2: Click the button “Run”.
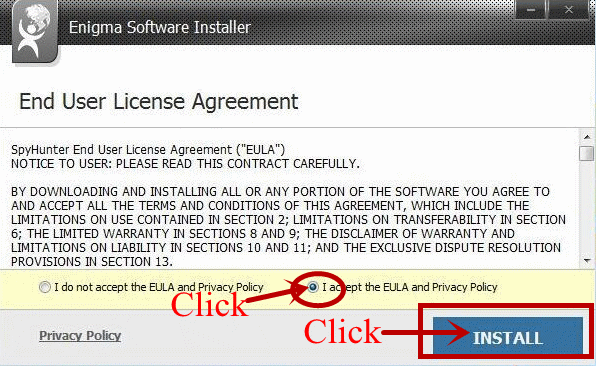
Step3: Please choose the option “I accept the EULA and Privacy Policy”, andthen click the button “INSTALL”.
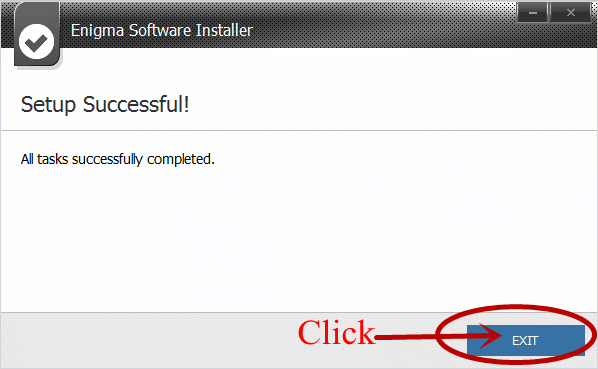
Step3: The software set up successfully as you see in this step, and then please click the button “EXIT”.
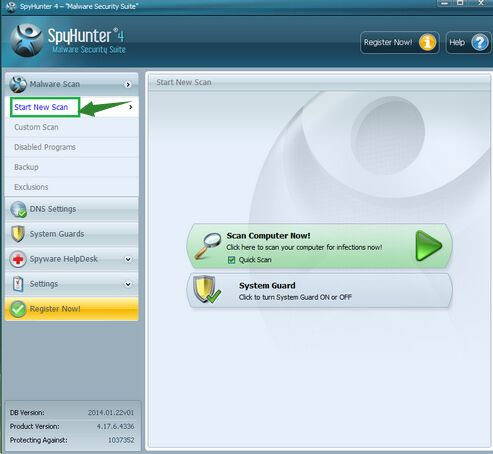
Step4: You can click the button “Start New Scan”, and you will see see the SpyHunter is scanning and detecting your computer.
Note: As Nginx virus is relatively tricky and stubborn, it can do much harm t your PC if you keep it in your system without taking any actions to remove it. If you have difficulties in removing Nginx virus, it is recommended that you use a good removal tool to get rid of it effectively.
No comments:
Post a Comment